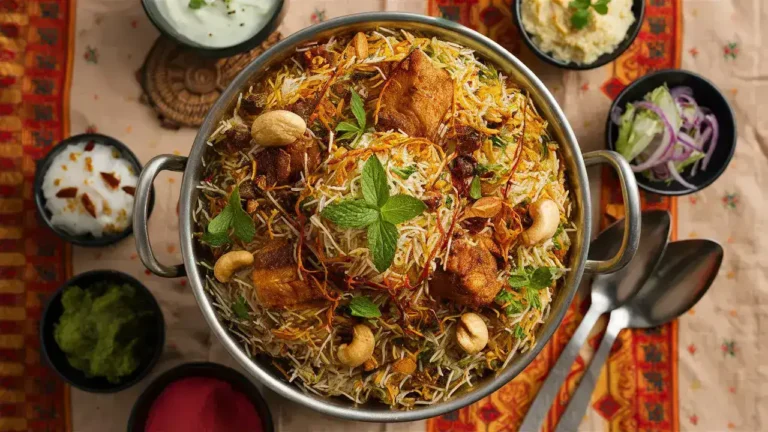
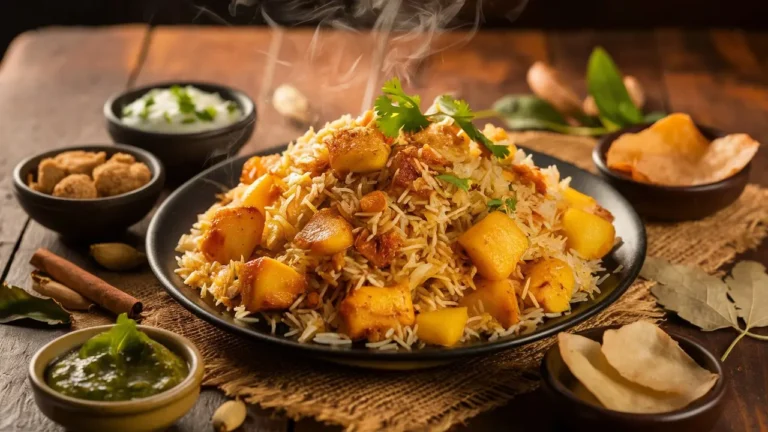
Are you craving the rich, aromatic flavors of South Indian cuisine? Look no further than the iconic Madrasi Biryani! This beloved dish from Chennai (formerly Madras) is a perfect blend of fragrant rice, tender meat, and aromatic spices. In this comprehensive guide, we’ll walk you through everything you need to know to create an authentic Madrasi Biryani in your own kitchen. Get ready to embark on a culinary adventure that’ll transport your taste buds straight to the streets of Chennai!
What Is Madrasi Biryani?
Madrasi Biryani is a flavorful rice dish that originated in the city of Chennai (formerly known as Madras) in South India. But what makes it unique? Unlike its North Indian counterparts, Madrasi Biryani boasts a distinct flavor profile that sets it apart from the crowd.
This biryani variant is characterized by its use of short-grain rice, typically Seeraga Samba, which gives it a unique texture. The meat – usually chicken or mutton – is marinated in a blend of yogurt and spices, then cooked separately before being layered with partially cooked rice. The dish is then slow-cooked to perfection, allowing the flavors to meld beautifully.
What’s the secret to its irresistible taste? It’s all in the spices! Madrasi Biryani uses a unique blend that includes star anise, fennel seeds, and curry leaves, giving it a distinctive South Indian twist. The result? A biryani that’s aromatic, flavorful, and utterly unforgettable!
The History of Madrasi Biryani
Ever wondered how this delectable dish came to be? Let’s take a trip down memory lane!
The story of Madrasi Biryani is as rich and complex as its flavors. While biryani itself has Persian roots, each region in India has developed its own unique version. Chennai, with its vibrant culinary scene, was no exception.
Legend has it that the Madrasi Biryani was born in the kitchens of the Nawabs who ruled the Arcot region of Tamil Nadu. These Nawabs, with their Mughal connections, brought with them the concept of biryani. However, local cooks adapted the recipe to suit South Indian tastes and available ingredients.
Over time, this fusion of Mughal and South Indian culinary traditions evolved into what we now know as Madrasi Biryani. It’s a testament to Chennai’s multicultural heritage and the city’s ability to make any dish its own!
Ingredients for Madrasi Biryani
Ready to cook up some Madrasi Biryani? Here’s what you’ll need:
- 2 cups Seeraga Samba rice (or short-grain rice)
- 500g chicken or mutton, cut into pieces
- 1 cup yogurt
- 2 large onions, thinly sliced
- 2 tomatoes, chopped
- 4 green chilies, slit
- 2 tbsp ginger-garlic paste
- 1/4 cup mint leaves
- 1/4 cup coriander leaves
- 2 tbsp ghee
- 2 tbsp oil
- Salt to taste
For the spice mix:
- 2 cinnamon sticks
- 4 cardamom pods
- 4 cloves
- 2 star anise
- 1 tsp fennel seeds
- 10-12 curry leaves
- 1 tsp turmeric powder
- 1 tbsp red chili powder
- 1 tsp garam masala
Can’t find Seeraga Samba rice? Don’t sweat it! While it’s the traditional choice for Madrasi Biryani, you can substitute it with any short-grain rice. The key is to avoid long-grain varieties like Basmati, which are more commonly used in North Indian biryanis.
Marinating the Meat
The secret to a great Madrasi Biryani lies in its perfectly marinated meat. Here’s how to do it:
- In a large bowl, mix the yogurt with ginger-garlic paste, turmeric powder, red chili powder, and salt.
- Add the meat pieces to this marinade and mix well, ensuring each piece is well-coated.
- Cover and refrigerate for at least 2 hours, or overnight for best results.
Why marinate, you ask? Marination serves two purposes. First, it tenderizes the meat, making it juicy and succulent. Second, it infuses the meat with the flavors of the spices, ensuring every bite is packed with taste.
Pro tip: Don’t skip the marination step! It’s crucial for achieving that authentic Madrasi Biryani flavor.
Preparing the Rice
Now, let’s talk about the rice – the backbone of any good biryani. Here’s how to prep it:
- Wash the rice thoroughly until the water runs clear.
- Soak the rice in water for about 30 minutes. This helps the grains cook evenly.
- In a large pot, bring water to a boil. Add a pinch of salt and a few drops of oil.
- Add the soaked and drained rice to the boiling water.
- Cook the rice until it’s about 70% done. It should still have a slight bite to it.
- Drain the rice and set aside.
Remember, we’re only partially cooking the rice at this stage. It’ll finish cooking when we layer it with the meat later. This two-step cooking process is what gives Madrasi Biryani its perfect texture – each grain separate and fluffy, yet infused with the flavors of the meat and spices.
Cooking the Meat
With the rice ready, it’s time to cook the marinated meat. Here’s how:
- Heat oil and ghee in a large, heavy-bottomed pan.
- Add the whole spices – cinnamon, cardamom, cloves, and star anise. Let them sizzle for a minute.
- Add sliced onions and fry until golden brown.
- Add the marinated meat and cook on high heat for 5 minutes, stirring frequently.
- Lower the heat, cover, and let it simmer until the meat is almost cooked.
- Add chopped tomatoes, green chilies, mint leaves, and coriander leaves. Cook for another 5 minutes.
The aroma wafting through your kitchen right now? That’s the smell of authentic Madrasi Biryani in the making!
Layering the Biryani
Now comes the fun part – layering the biryani. This is where the magic happens!
- In a large, heavy-bottomed pot, spread a layer of the partially cooked rice.
- Top it with a layer of the cooked meat mixture.
- Sprinkle some fried onions, mint leaves, and coriander leaves.
- Repeat these layers until you’ve used up all the rice and meat.
- The top layer should be rice.
- Sprinkle some saffron-infused milk over the top layer for added flavor and color.
Layering is crucial in Madrasi Biryani. It allows the flavors to meld together perfectly during the final cooking process.
The Dum Cooking Process
The final step in making Madrasi Biryani is the ‘dum’ cooking process. Here’s how it’s done:
- Cover the pot with a tight-fitting lid.
- Seal the edges with dough or a wet cloth to prevent steam from escaping.
- Place the pot on very low heat and cook for about 20-25 minutes.
This slow-cooking process allows the flavors to meld together beautifully. The steam trapped inside the pot helps cook the rice fully while infusing it with the aromatic flavors of the meat and spices.
When you finally open the pot, you’ll be greeted with the irresistible aroma of perfectly cooked Madrasi Biryani!
Serving Suggestions
Congratulations! You’ve just made your very own Madrasi Biryani. But how should you serve it? Here are some suggestions:
- Gently fluff the biryani with a fork before serving.
- Serve hot, garnished with extra fried onions and coriander leaves.
- Accompany with raita (yogurt dip) and a simple salad of sliced onions and cucumber.
- For an authentic Chennai experience, serve with “Dalcha” – a lentil-based side dish popular in South India.
Remember, Madrasi Biryani is a complete meal in itself. It’s packed with proteins, carbs, and a variety of vegetables, making it a well-balanced dish.
Vegetarian Variation
Who says vegetarians can’t enjoy Madrasi Biryani? Here’s how to make a delicious veggie version:
- Replace the meat with a mix of vegetables like carrots, peas, beans, and potatoes.
- Paneer (Indian cottage cheese) or soya chunks make great protein substitutes.
- Follow the same cooking process, adjusting the cooking time for vegetables.
The key to a great vegetarian Madrasi Biryani is to use a variety of vegetables with different textures. This ensures your biryani is just as interesting and flavorful as its meaty counterpart!
Health Benefits of Madrasi Biryani
Believe it or not, Madrasi Biryani isn’t just delicious – it can be part of a balanced diet too! Here’s why:
- Rich in proteins: The meat (or vegetables in the veggie version) provides essential proteins.
- Complex carbohydrates: The rice offers sustained energy release.
- Spices like turmeric and ginger have anti-inflammatory properties.
- Yogurt in the marinade aids digestion.
Of course, moderation is key. Madrasi Biryani is a rich dish, so enjoy it as an occasional treat rather than a daily staple.
Common Mistakes to Avoid
Even experienced cooks can sometimes struggle with biryani. Here are some common pitfalls to avoid when making Madrasi Biryani:
- Overcooking the rice: Remember, it should be only 70% cooked before layering.
- Skimping on the marination: This step is crucial for flavor development.
- Using too much water: This can make your biryani mushy.
- Lifting the lid during dum cooking: This lets the steam escape, affecting the final texture.
- Not letting the biryani rest: Allow it to sit for 5-10 minutes after cooking for the flavors to settle.
Avoid these mistakes, and you’re well on your way to Madrasi Biryani perfection!
Madrasi Biryani vs. Other Biryanis
How does Madrasi Biryani stack up against other popular biryani varieties? Let’s compare:
- Hyderabadi Biryani: Uses long-grain rice and is typically spicier.
- Lucknowi Biryani: Known for its subtle flavors and use of kewra water.
- Kolkata Biryani: Uniquely includes potatoes and eggs.
- Malabar Biryani: Uses short-grain rice like Madrasi, but with a different spice blend.
While each has its unique charm, Madrasi Biryani stands out for its use of fennel seeds and curry leaves, giving it a distinct South Indian flavor profile.
Frequently Asked Questions
Here are some common questions about Madrasi Biryani:
- Can I use basmati rice for Madrasi Biryani?
While traditionally made with short-grain rice, you can use basmati in a pinch. However, the texture and flavor will be different. - How spicy is Madrasi Biryani?
It’s moderately spicy, but you can adjust the heat level to your preference by changing the amount of chili powder used. - Can I make Madrasi Biryani in a pressure cooker?
Yes, but you’ll miss out on the layering and dum cooking process, which contributes significantly to the flavor. - How long can I store leftover Madrasi Biryani?
It can be refrigerated for up to 2 days. Reheat thoroughly before serving. - What’s the best meat for Madrasi Biryani?
Traditionally, it’s made with chicken or mutton. Choose based on your preference and dietary restrictions.
Conclusion
There you have it – your ultimate guide to making authentic Madrasi Biryani at home! This iconic dish from Chennai is more than just a meal; it’s a celebration of flavors, a testament to South India’s rich culinary heritage.
Whether you’re cooking for a special occasion or just want to treat yourself to something extraordinary, Madrasi Biryani is sure to impress. Remember, the key to a great biryani lies in the quality of ingredients, the perfect balance of spices, and most importantly, the love you put into making it.
So, why wait? Gather your ingredients, fire up that stove, and let the enticing aroma of Madrasi Biryani fill your home. Happy cooking!
Did you enjoy Madrasi Biryani Recipe? Follow us on Instagram @ketotacosalad for more delicious keto recipes and mouthwatering food photos!


